Image Credit: Energy Vanguard
Remember my bathroom remodeling project? I took the liberty of gutting our outdated, decaying bathroom while my wife was out of town in April. I found some interesting air leakage pathways when I opened the walls. I fixed that. I found termite damage. I fixed that.
Our 1970 condo didn’t have an exhaust fan in this bathroom because, hey, who needs a bath fan when you have a window? I fixed that. Here’s how.
Bath fans are essential pieces of equipment for homes. One of their primary functions is to get rid of moisture. I’ve been tracking temperature and relative humidity in my bathroom for a couple of years now so I’ve seen the difference. The difference with the new exhaust fan is remarkable.
I used a Broan exhaust fan rated at 80 cubic feet per minute (cfm). Most bath fans don’t get the amount of air flow they’re rated for. Heck, the majority don’t even come close. The typical bath fan gets about half its rated flow. I wanted to make sure this one delivered, and it does.
Break on through to the other side
In an existing home, the first thing you’ve got to do is figure out how you’re going to get the exhaust air to the outdoors. You can’t just dump it in a attic or other buffer space. Since there’s conditioned space above our bathroom (another condo), going through the attic wasn’t an option. I had to go through the band joist.
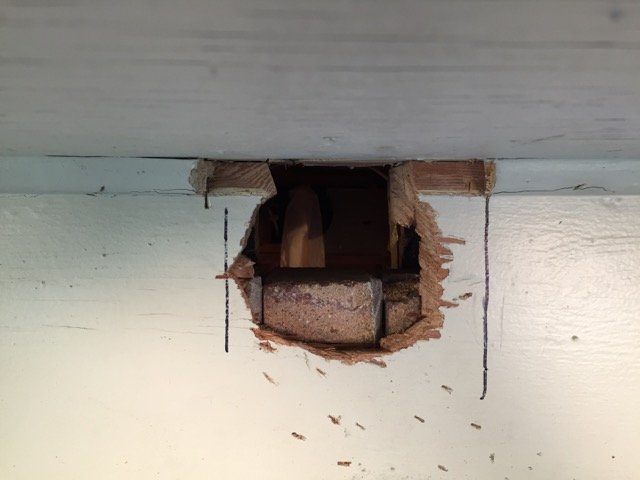
As you can tell from the photo at right, making a hole to run the duct through was a major pain. If you’ve ever done this kind of work, you know the origin of those marks below the hole. If not, let me describe the process here.
I had to go through four layers of material in this wall. On the inside, I had to cut through the 2×6 band joist first. Then the Celotex, which was the easiest part. Then brick. Then the 1-by trim board on the outside. The photo above was taken from the outside.
Those marks below the hole are from my reciprocating saw bouncing out occasionally as I cut that hole from the outside. The saw would cut through wood, hit the brick, and then recoil. But I was still pushing so it immediately went back toward the board, and it usually hit below the hole. Hence those marks.
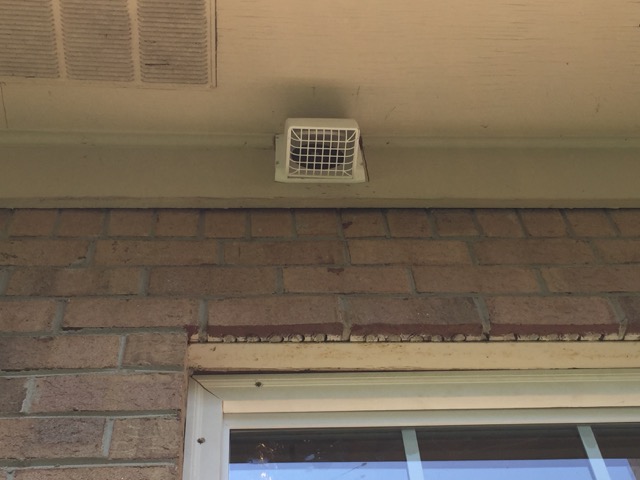
Eventually I got the hole cut, the bricks chiseled out, and the 4-inch duct all the way through the hole. It was exhausting work. There’s my wall cap in the photo at right, shown with the flapper out because the fan was on at the time.
I know what some of you are thinking. Exhausting below the soffit is a terrible idea because moisture-laden air will be drawn back into the soffit through that vent you see. Two things. First, I really had no other choice here. It was either vent there or don’t install a fan. I chose to vent below the soffit. Second, it shouldn’t ever cause a problem. The exit velocity is high enough that the air moves the leaves on the hedges 10 feet below. Little of that air will make its way back to the soffit.
It’ll be interesting to see if we get a spot of frost on the hedges on cold winter days.
Preventing backflow
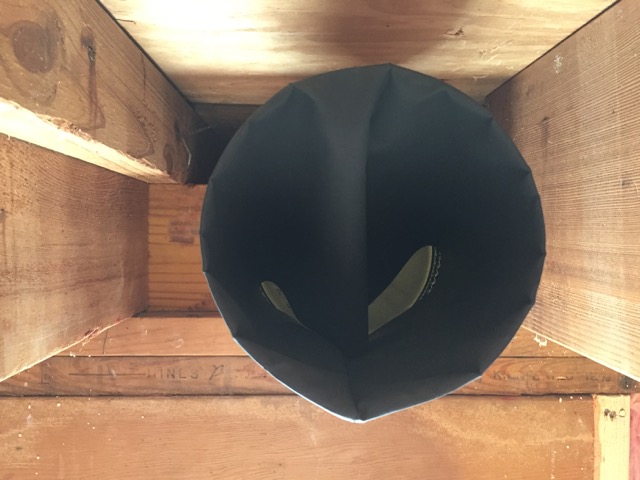
I don’t trust the little flapper on the outside to prevent air from coming back into the house when the fan’s not running. And I certainly didn’t trust the flapper that came inside the fan. (That’s a photo of it in Image #2 at the bottom of the page.) Do you think there might be a little bit of bypass? The flapper didn’t even move when I ran the fan with no duct attached, so I just pulled it out.
Instead I installed a Cape Backdraft Damper from Tamarack Technologies. It’s a diode or check valve for air flow. Air can flow to the outside because that piece of grey latex see moves with the breeze, like a flag. But if air tries to come back in when the fan is off, that piece of latex falls into the airstream and blocks the flow.
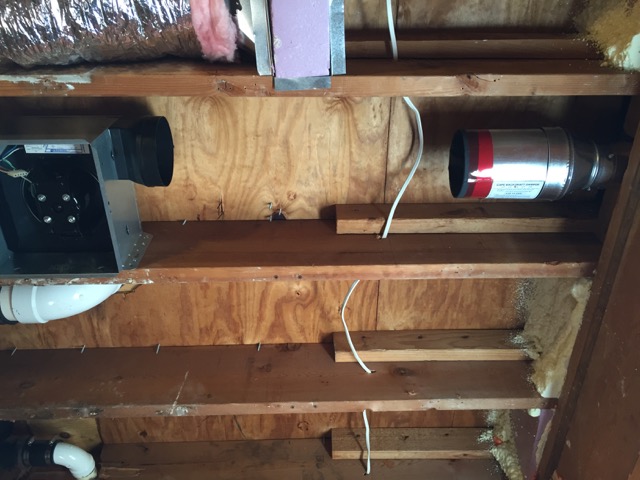
The photo below shows the exhaust fan on the left and the Cape damper on the right.
Yes, I used flex duct
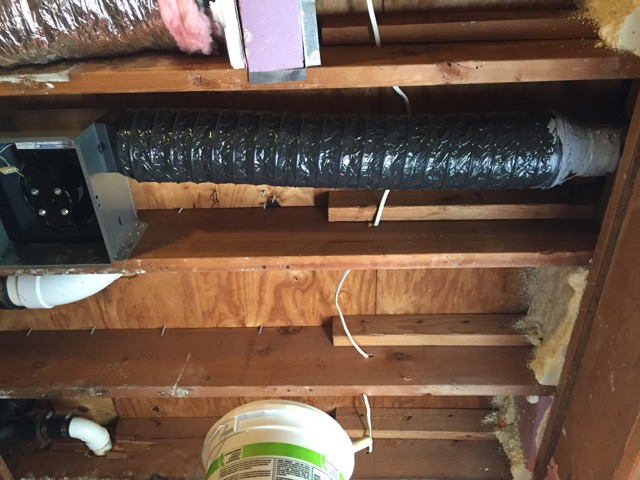
The next photo shows the flex duct connecting the fan to the duct that goes out through the wall.
It slides right over the Cape damper. I used zip ties and lots of mastic to hold the duct on and seal it up. In the photo, the left end wasn’t attached yet because I hadn’t installed the insulation jacket over it yet. After I did that, the left side got zipped and sealed, too.
Should I have used rigid metal instead of flex? Some people might think so. I’m confident this duct will last as long as it needs to, though, and it performs just fine.
How much air does it move?
Of course I tested it for air flow once it was done. I tried it out in different configurations: with the grille on and off, with the window open and closed, and with the bathroom door open and closed. My 80 cfm fan moved an average of 66 cfm during those tests. The range was 50 cfm to 75 cfm, and I don’t completely trust that the 50 cfm was correct. That was with the grille on, and the exhaust fan flow device I used fit tightly over the fan and seemed to interfere with the flow.
I’ve installed a few exhaust fans in my life. It always seems like it should be an easy process. Occasionally it is. That wasn’t the case in our bathroom remodel. But it was well worth it.
Allison Bailes of Decatur, Georgia, is a speaker, writer, building science consultant, and the author of the Energy Vanguard Blog. Check out his in-depth course, Mastering Building Science at Heatspring Learning Institute, and follow him on Twitter at @EnergyVanguard.
Weekly Newsletter
Get building science and energy efficiency advice, plus special offers, in your inbox.




4 Comments
Allison
Save your siding and avoid the nasty shaped hole by ditching the reciprocating saw and using a multi-master or hole-saw
Response to Malcolm Taylor
Thanks for the tip, Malcolm. Yes, in hindsight I probably should have bought a hole saw. I have a bunch but none big enough for this job so I used what I had.
What type of insulation is recommended over the flex pipe? I have metal flex pipe in an unfinished attic. Is foam core insulation better than fiberglass or cotton?
I was thinking about a installing a few of those back draft dampers. I was wondering if there's any recommendation regarding using them on a range hood or if grease would be an issue? I was definitely going to put one in my bathroom exhaust fan duct, but I was wondering if there's any opinion on removing one of the existing dampers first? Because of what I see it. I'll have three of them then. There's the damper where it exits the roof? ( Definitely leaving that one in) , The fan itself has a damper built in and now I'll be adding this one. I was thinking if I have access it might be a good idea to remove the one in the fan. Be nice to check the flow difference if there is one. Any thoughts?
Log in or create an account to post a comment.
Sign up Log in